Graco Solano 4-in-1 Convertible Crib Assembly Instructions: A Comprehensive Guide
This guide details assembling the Graco Solano crib, featuring a classic design and convenient storage drawer. Ease of assembly is key,
considering instruction clarity and hardware inclusion.
The Graco Solano 4-in-1 Convertible Crib is designed to grow with your child, offering exceptional value and versatility. This crib seamlessly transitions through four distinct stages: a traditional crib for infants, a toddler bed for growing toddlers, a convenient daybed for relaxed lounging, and finally, a full-size bed for older children.
Beyond its adaptability, the Solano crib incorporates a practical storage drawer, maximizing space in the nursery. Assembling this crib requires careful attention to detail, ensuring a safe and secure environment for your little one. Understanding the assembly process, including hardware identification and step-by-step instructions, is crucial for a successful outcome. This guide aims to provide a comprehensive walkthrough, addressing potential challenges and ensuring a smooth assembly experience.
Understanding the 4-in-1 Functionality
The Graco Solano’s core strength lies in its adaptability. Initially configured as a standard crib, it provides a safe and secure sleeping space for newborns and infants. As your child grows, the crib effortlessly converts into a toddler bed, facilitating a smooth transition as they gain independence.
Further enhancing its longevity, the Solano transforms into a daybed, offering a comfortable resting or play area. Finally, it evolves into a full-size bed, accommodating your child well into their later years. Each conversion requires specific kit components (often sold separately) and adjustments to the existing frame. Understanding these stages and the necessary modifications is vital for maximizing the crib’s lifespan and value; This multi-functional design ensures a lasting investment for your family.
Safety Precautions Before Assembly
Prioritize safety throughout the assembly process. Always assemble the crib on a flat, level surface to ensure stability. Carefully inspect all parts for damage before beginning; do not use damaged components. Keep small parts and packaging away from children to prevent choking hazards.
Adhere strictly to the provided instructions, avoiding modifications or substitutions. Ensure all screws, bolts, and dowels are tightened securely, but avoid over-tightening, which could compromise the wood. Regularly inspect the crib for loose hardware after assembly and throughout its use. A breakdown in structural integrity can create unsafe conditions. Remember, a properly assembled crib is crucial for your child’s well-being and peaceful sleep.

Parts List and Identification
Verify all components are present: side rails, headboard, footboard, drawer parts, mattress support, and all necessary hardware – screws, bolts, and dowels.
Crib Side Rails (Left & Right)
Identifying the left and right side rails is crucial for correct assembly. These panels feature pre-drilled holes for attaching to the headboard and footboard, as well as for supporting the mattress. Ensure you differentiate between the rails; they are not interchangeable due to hole placement variations.
Carefully inspect each rail for any damage incurred during shipping. The side rails contribute significantly to the crib’s structural integrity, so any defects must be addressed before proceeding. Pay close attention to the orientation of the rails – the finished side should face outwards.
During attachment, ensure the rails are flush with the headboard and footboard to create a stable and secure frame. Proper alignment prevents wobbling and ensures the safety of the sleeping area. Double-check the hardware used; incorrect screws can compromise the connection.
Crib Headboard & Footboard
The headboard and footboard establish the crib’s foundational structure. Carefully unpack these components, inspecting for any shipping damage. Note the distinct designs – the headboard is typically taller and may feature decorative elements, while the footboard is generally lower. Pre-drilled holes are present on both pieces for side rail attachment.
Orientation is key; ensure the finished sides face outwards for aesthetic appeal. The headboard often has a higher weight capacity for future bed conversions. When attaching side rails, align the holes precisely to guarantee a secure and stable connection.
Double-check the hardware used – using the correct screws is vital for structural integrity. A wobbly connection can compromise safety. Proper assembly of the headboard and footboard is paramount for the overall stability of the Graco Solano crib.

Drawer Components
The Graco Solano’s integrated drawer offers valuable storage. Identify all drawer parts: the drawer box sides (typically four pieces), the drawer bottom panel, and the drawer front. Separate these from the main crib components to avoid confusion. Examine each piece for pre-drilled holes or designated slots for assembly.
Pay close attention to the drawer slides – these are crucial for smooth operation. There will be a set for the drawer itself and a corresponding set to attach to the crib frame. Ensure you understand their orientation (left and right) before proceeding.
The drawer front is often finished and may have pre-installed hardware. Handle it carefully to prevent scratches. Correct identification and organization of these components will streamline the drawer assembly process significantly.
Hardware Identification (Screws, Bolts, Dowels)
Accurate hardware identification is paramount for successful assembly. The Graco Solano kit includes various screws, bolts, and dowels, each serving a specific purpose. Carefully compare each piece to the parts list in the instruction manual. Screws will likely vary in length and head type (Phillips, flathead).
Bolts, often used for structural connections, may require washers. Dowels provide additional stability in joints, fitting into pre-drilled holes. Missing or misidentified hardware can halt progress and compromise safety.
Organize the hardware into labeled containers to prevent mixing. The manual should clearly indicate which hardware is used in each step. Double-check quantities before starting each phase to avoid discovering shortages mid-assembly.

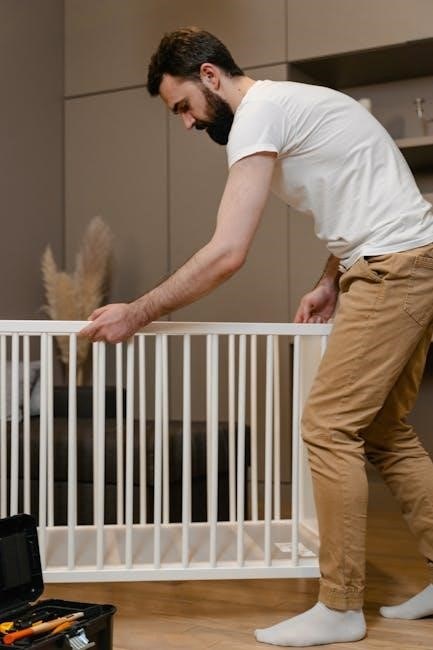
Assembly Steps: Crib Frame
Begin by attaching side rails to the headboard, ensuring proper alignment. Then, securely fasten the footboard, followed by installing the mattress support system.
Attaching the Side Rails to the Headboard
Carefully position the left and right crib side rails against the headboard. Ensure the pre-drilled holes align correctly for a secure connection. Utilize the provided bolts and screws – referencing the hardware identification guide is crucial.
Begin by loosely threading the bolts to allow for adjustments. Once all bolts are in place, tighten them gradually and evenly. Avoid over-tightening, as this could potentially damage the wood or strip the screw threads. Double-check the alignment of the side rails with the headboard to guarantee a stable and square frame.
If encountering difficulty aligning the parts, slightly loosen the bolts and gently reposition the side rails. A second person can be helpful during this step to hold the rails in place. Proper attachment here is foundational for the entire crib’s structural integrity.
Securing the Footboard
With the side rails attached to the headboard, carefully position the footboard. Align the pre-drilled holes on the footboard with those on the side rails, mirroring the process used for the headboard attachment; Again, consult the hardware identification section to ensure you’re using the correct bolts and screws.
Similar to the headboard, loosely thread the bolts initially, allowing for minor adjustments. This prevents binding and ensures a flush connection. Once all bolts are engaged, tighten them progressively and evenly, avoiding excessive force. A stable footboard is vital for the crib’s overall structural soundness.
Inspect the connection points to confirm a secure fit. If misalignment occurs, gently loosen the bolts and reposition the footboard before re-tightening. A properly secured footboard contributes significantly to the crib’s safety and longevity.
Installing the Mattress Support System
Once the crib frame is fully assembled, it’s time to install the mattress support system. This typically involves metal support slats or a solid platform, depending on the specific Graco Solano model. Locate the designated slots or brackets within the crib frame designed to hold the support system.
Carefully insert the support slats or position the platform, ensuring it’s level and securely seated. Use the provided hardware – often screws or locking pins – to fasten the support system to the frame. Double-check that all fasteners are tightened appropriately, but avoid over-tightening, which could damage the wood.
The mattress support must be robust and stable to safely hold the mattress and a sleeping child. Verify the support system is firmly in place before proceeding to the next step. A secure mattress foundation is paramount for infant safety.

Drawer Assembly
The Graco Solano includes a convenient storage drawer. Assembling it involves constructing the drawer box, installing slides, and attaching the drawer front securely;
Assembling the Drawer Box
Begin by identifying all drawer box components – typically consisting of a drawer bottom, two drawer sides, a drawer front, and a drawer back. Carefully align the drawer sides with the drawer front and back pieces, ensuring the pre-drilled holes are correctly positioned for secure fastening.
Utilize the provided screws or dowels and cam locks (if included) to join these pieces, tightening them firmly but avoiding over-tightening, which could damage the wood. Once the frame is assembled, slide the drawer bottom into the designated grooves within the drawer sides.
Ensure the bottom panel is fully seated and flush with the frame. Double-check all connections for stability and squareness before proceeding to the next step. A properly assembled drawer box is crucial for smooth drawer operation and overall crib functionality.
Installing Drawer Slides
Drawer slides are essential for smooth drawer movement. Separate the drawer slides into cabinet-side and drawer-side components. Typically, the longer portion attaches to the crib frame, and the shorter portion to the drawer box itself. Align the cabinet-side slides within the designated openings inside the crib frame, ensuring they are level and flush.
Secure them using the provided screws, being careful not to strip the screw holes. Next, attach the drawer-side slides to the exterior of the drawer box, again ensuring proper alignment and secure fastening.
Once both sets of slides are installed, carefully slide the drawer box into the crib frame, engaging the slides. Test the drawer’s movement to confirm smooth operation; any resistance indicates misalignment and requires adjustment.
Attaching the Drawer Front
Carefully position the drawer front onto the assembled drawer box, ensuring even alignment on all sides. This step significantly impacts the finished look, so precision is crucial. Locate the pre-drilled holes on both the drawer front and the drawer box – these are designed for secure attachment.
Using the appropriate screws (refer to the hardware identification section), gently fasten the drawer front to the drawer box. Avoid over-tightening, as this could damage the wood or misalign the front.
Double-check the alignment after initial fastening, making minor adjustments if necessary before fully securing all screws. A properly attached drawer front should be flush and operate smoothly within the installed drawer slides.

Converting the Crib
The Graco Solano adapts through stages: crib to toddler bed, then daybed, and finally a full-size bed, offering lasting value and functionality.
From Crib to Toddler Bed Conversion
Transitioning the Graco Solano from a crib to a toddler bed involves a few straightforward steps, designed for ease and safety. First, carefully remove the crib side rails, ensuring all hardware is securely detached and stored. Next, locate and attach the toddler guardrail, typically included with the crib components, to one side of the now-open crib frame.
This guardrail prevents accidental roll-offs during sleep. The mattress support system will need to be adjusted to its lowest setting to maintain a safe height for your growing toddler. Ensure all connections are tight and secure before introducing the toddler bed to your child. Double-check for any protruding hardware or sharp edges; This conversion allows for a seamless transition as your child grows, extending the lifespan and usability of the Graco Solano.
From Toddler Bed to Daybed Conversion
Converting the Graco Solano from a toddler bed to a daybed is a simple process, maximizing the furniture’s versatility. Begin by completely removing the toddler guardrail that was previously attached. This creates an open side, transforming the bed into a daybed configuration. The mattress support should remain at its lowest setting for safety and ease of access.
A daybed offers a comfortable space for reading, playing, or relaxing during the day, in addition to sleeping. Ensure the floor surrounding the daybed is clear of obstacles to prevent accidental bumps or injuries. Consider adding soft cushions or pillows to enhance comfort and create a cozy atmosphere. This conversion provides a new function for the bed as your child’s needs evolve, offering continued value and adaptability.
From Daybed to Full-Size Bed Conversion
Transitioning the Graco Solano from a daybed to a full-size bed requires a separate full-size bed frame and a box spring. The Solano’s headboard and footboard are designed to attach to a standard full-size bed frame using appropriate hardware – typically bolts and washers, which may need to be purchased separately.
Carefully detach the headboard and footboard from the existing daybed structure. Align them with the mounting points on the new full-size bed frame and securely fasten them. Ensure all connections are tight and stable before placing the box spring and mattress. This final conversion extends the crib’s lifespan, providing a bed suitable for older children and even young adults, maximizing the investment in this versatile piece of furniture.

Troubleshooting Common Assembly Issues
Common problems include missing hardware, alignment difficulties, and drawers not sliding smoothly. Addressing these promptly ensures a safe and functional Graco Solano crib setup.
Missing Hardware
Discovering missing hardware during Graco Solano assembly is frustrating, but resolvable; First, meticulously re-check all packaging – often small parts are hidden within protective layers. Compare received components against the detailed parts list included in these instructions; a clear identification process is crucial.
If a piece remains missing, do not attempt to substitute with non-original hardware, as this compromises safety and structural integrity. Contact Graco’s customer support immediately. Have your crib model number and purchase date readily available to expedite the process.
Graco typically offers replacement parts free of charge, shipping them within a reasonable timeframe. While awaiting replacements, avoid proceeding with assembly to prevent further complications. Document the missing part with a photo for clarity when contacting support.
Difficulty Aligning Parts
Encountering alignment issues during Graco Solano assembly is common, often stemming from slight manufacturing variations or improper initial connections. Avoid forcing parts together; excessive pressure can damage the wood or strip screw holes. Double-check that you’re using the correct hardware for each step, referencing the parts list diligently.
Loosen previously tightened screws slightly to allow for greater flexibility during alignment. Gently manipulate the parts until they fit flush, then retighten all fasteners securely. Ensure the crib is assembled on a level surface; an uneven floor can exacerbate alignment problems.
If persistent, disassemble the affected section and begin again, paying close attention to the orientation of each piece. Refer to the diagrams in these instructions for visual guidance.
Drawer Not Sliding Smoothly
If the Graco Solano drawer doesn’t slide easily, the issue likely lies with the drawer slides. First, confirm they are correctly installed and fully extended on both the drawer box and the crib frame. Inspect for any obstructions, like stray screws or wood shavings, hindering movement.
Apply a silicone-based lubricant to the drawer slide rails; avoid oil-based products as they can attract dust. Gently push and pull the drawer several times to distribute the lubricant evenly. Ensure the drawer is properly aligned within the frame – misalignment can cause friction.
Check that the drawer box is square; a warped box will bind. If problems persist, slightly loosen the screws securing the drawer slides and readjust, then retighten.

Maintenance and Care
Regularly inspect the Graco Solano crib for loose hardware and ensure all components remain secure. Cleaning and proper storage will prolong its lifespan.
Cleaning the Crib
Maintaining a clean Graco Solano crib is essential for your child’s health and safety. Regularly wipe down all surfaces – the crib frame, side rails, headboard, footboard, and drawer – with a soft, damp cloth. Avoid harsh chemicals, abrasive cleaners, or bleach, as these can damage the finish and potentially harm your baby.
For tougher stains or sticky messes, a mild soap solution (like baby soap diluted in water) can be used, but always rinse thoroughly with a clean, damp cloth afterward to remove any soap residue. Ensure the crib is completely dry before placing your baby back inside. The drawer can be cleaned similarly, paying attention to the drawer slides to keep them functioning smoothly.
Periodically check for dust buildup in crevices and along edges. A vacuum cleaner with a brush attachment can be helpful for this. Remember to prioritize gentle cleaning methods to preserve the crib’s integrity and your child’s well-being.
Inspecting for Loose Hardware
Regularly inspecting the Graco Solano crib for loose hardware is a critical safety precaution. At least monthly, and especially after any conversion (crib to toddler bed, etc.), meticulously check all screws, bolts, and dowels. Gently attempt to wiggle each component; any movement indicates a potential issue.
Pay close attention to the connections between the side rails, headboard, footboard, and mattress support system. Also, examine the drawer slides and the drawer front attachment points. Tighten any loose hardware immediately using the appropriate tools. Do not overtighten, as this could strip the screws or damage the wood.
If you discover any missing or damaged hardware, do not continue using the crib until replacements are obtained. Contact Graco customer support for assistance in sourcing the correct parts. Consistent hardware checks are paramount for maintaining a secure and stable sleep environment for your child.
Long-Term Storage Instructions
When storing the Graco Solano 4-in-1 crib for extended periods, proper preparation is essential to prevent damage and ensure future usability. Disassemble the crib completely, carefully labeling all parts and hardware – a parts list from the original instructions is invaluable. Place all hardware in a sealed bag and attach it to the corresponding component.
Clean all wooden surfaces with a damp cloth and allow them to dry thoroughly before storage. Avoid harsh chemicals or abrasive cleaners. Store the disassembled crib in a dry, climate-controlled environment, away from direct sunlight and extreme temperatures. Protect the parts with blankets or furniture covers to prevent scratches and dust accumulation.

Periodically check the stored components for any signs of moisture or pest infestation. Proper storage will preserve the crib’s integrity for future use, whether for another child or as a family heirloom.